KEEP IN TOUCH
Subscribe to our mailing list to get free tips on Data Protection and Cybersecurity updates weekly!



Like almost all operating systems, Windows 10 is vulnerable to security and privacy issues, and researchers have proved that Microsoft can track a lot of your activities to improve their products and enable personalized ads and promotions.
Thankfully, Windows 10 allows us to improve the operating system’s security and privacy using the built-in settings app. If you’ve concerns about your data security and privacy, you should consider making the below changes.
Below we outline some important features that can enhance the security of Windows 10 devices.
In Windows 10 version 2004 or newer, there’s a new feature called Potentially unwanted applications (PUA) protection. As the name suggests, PUA protection allows Windows 10 to detect potentially unwanted apps using Microsoft Defender (formerly known as Windows Defender).
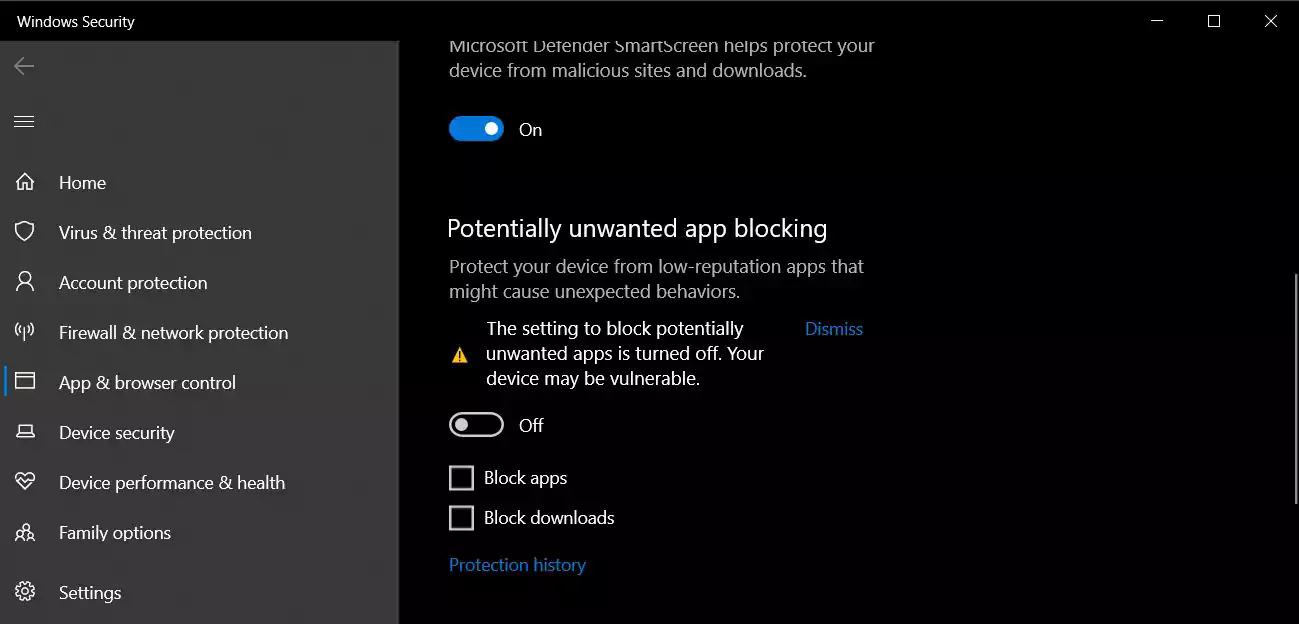
For those uninitiated, potentially unwanted applications (PUA) generally cause issues with Windows and other installed apps, and they can also make your device slower or buggy. These unwanted apps are not considered virus or malware, but it’s widely believed that they can modify your web browsers, change the default behavior and perform other actions without your permission.
To enable PUA/PUP protection in Windows 10 2004, follow these steps:
You can click on the ‘Turn on’ button to enable the feature. If you want to configure PUA/PUP, you can also click on the ‘Reputation-based protection settings’.
This will allow you to access the following settings:
For more detailed information, see our article on how Windows 10 2004 improves potentially unwanted app protection.
Also Read: What Do 4 Messaging Apps Get From You? Read The iOS Privacy App Labels
Windows 10 comes with another brilliant feature called “Core isolation”, which aims to protect your device against malware and other attacks. Core isolation feature isolates computer processes from the software and hardware, and it enables an extra layer of security against sophisticated attacks.
Memory integrity, which is a part of Core isolation, uses hardware virtualization and Hyper-V to prevent attempts to inject and run malware in Windows kernel-mode processes.
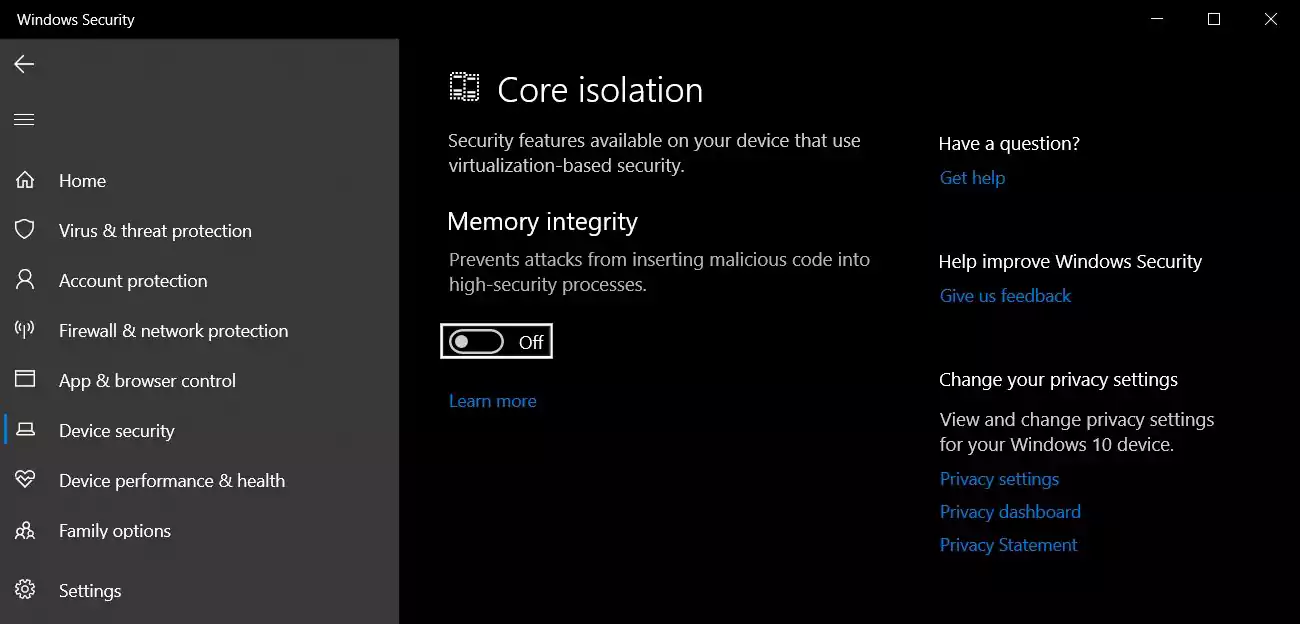
In order to use core isolation’s memory integrity feature, follow these steps:
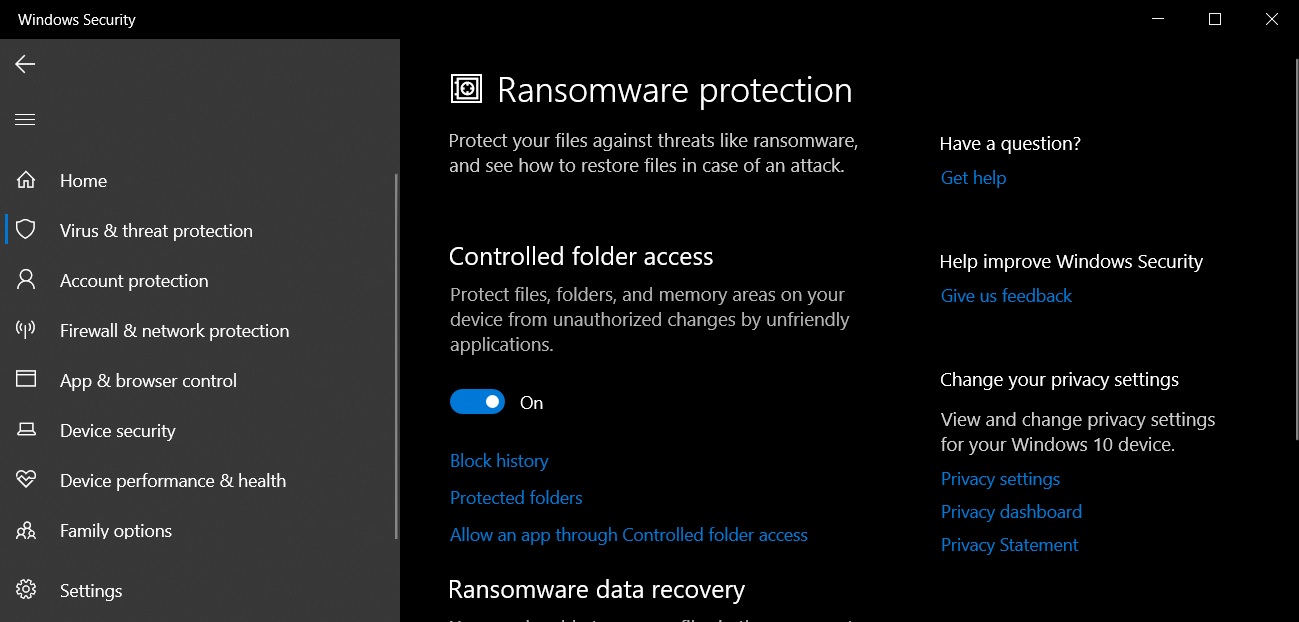
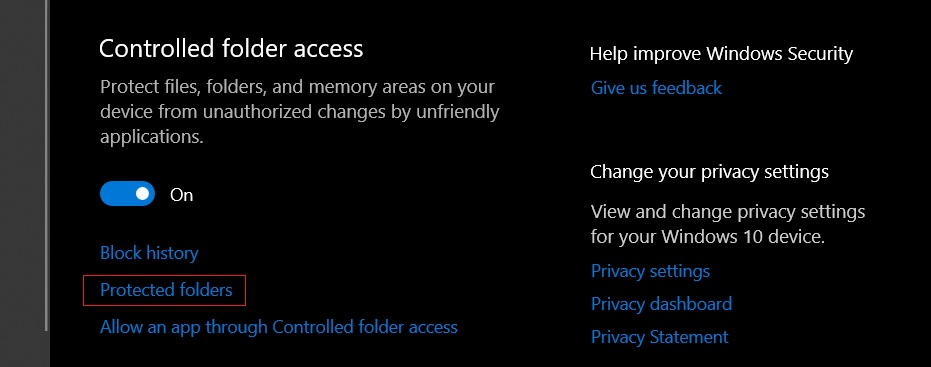
Another exciting security feature in Windows 10 is “Controlled Folder Access”, which basically allows you to prevent unauthorized access to certain folders.
This feature gives you greater control over sensitive folders and it can also prevent ransomware or any attempt to access and encrypt your documents, pictures, and other files stored in those folders.
For more detailed information, see our article on how Controlled Folder access works.
Network scanning is included with Windows Defender and it allows you to scan your network files. However, the feature is disabled by default and interested users need to enable it manually with PowerShell.
To use enable network scanning, follow these steps:

By following the above steps, you can use Defender to scan network files. If you want to turn off the feature, enter the following command in PowerShell:
If you’re concerned about privacy and how your data is being used by Microsoft, you should make the below changes to increase privacy in Windows 10.
All consumer-oriented versions of Windows 10 show ads or recommendations by default and Microsoft also create an advertising ID for your user account. The advertising ID is linked to your Microsoft account and it is used to trailer recommendations/ads for Microsoft services.
Fortunately, Windows 10 allows you to turn off the advertising ID and it even lets you disable the ads that you see in the Start menu and other places.
To turn off the settings, follow these steps:
When done, your General settings should look like the following image.
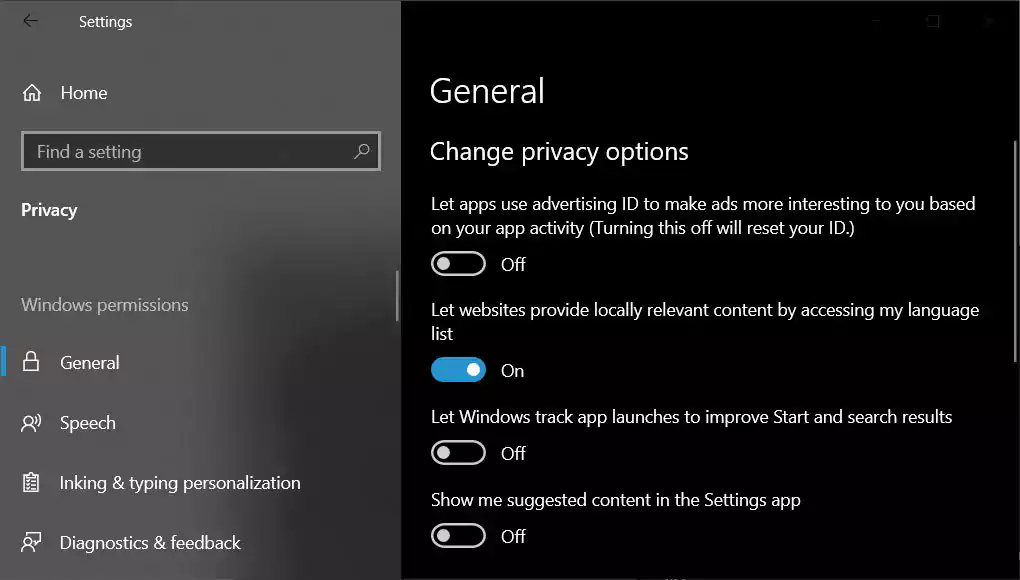
As mentioned above, Microsoft uses Start Menu to show suggestions/ads/recommendations for Microsoft Store apps and services. For example, Microsoft recently started displaying ads for the new Microsoft Edge browser in the Start Menu.
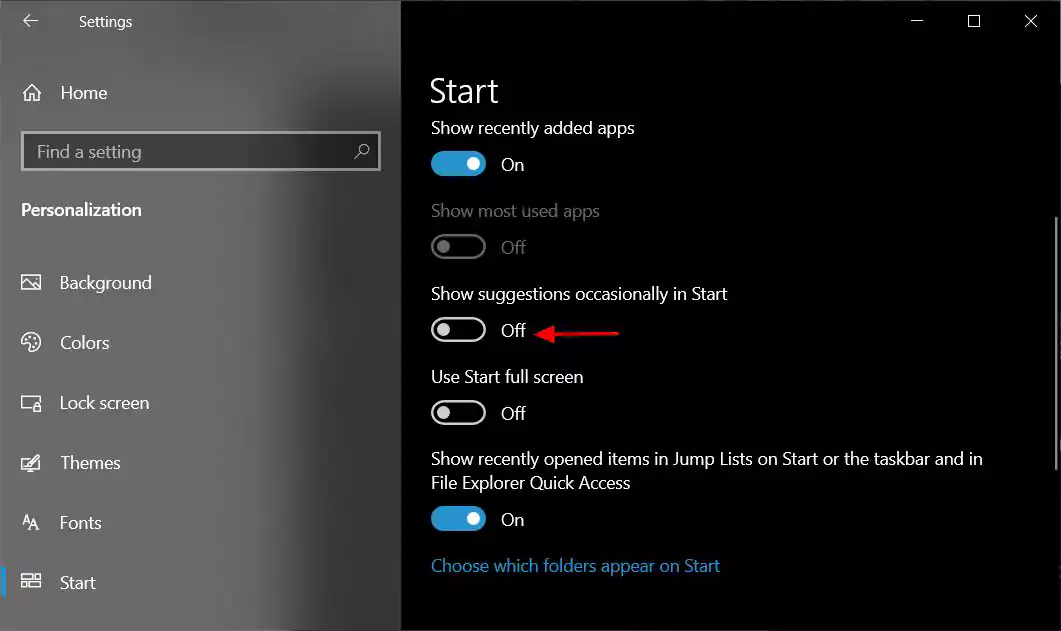
To disable these suggestions, go to Settings > Start and disable ‘Show suggestions occasionally in Start‘ as shown above.
Also Read: Key PDPA Amendments 2019/2020 You Should Know
Windows 10 collects the hardware and software diagnostic data on a regular basis to improve Windows experience on your device, according to Microsoft. The data collection cannot be turned off completely, but you can control what kind of diagnostic data is gathered about you, your applications, and your device.
To manage your diagnostic data, head to Settings > Privacy > Diagnostics & Feedback.
You’ll see two options—Basic and Full.
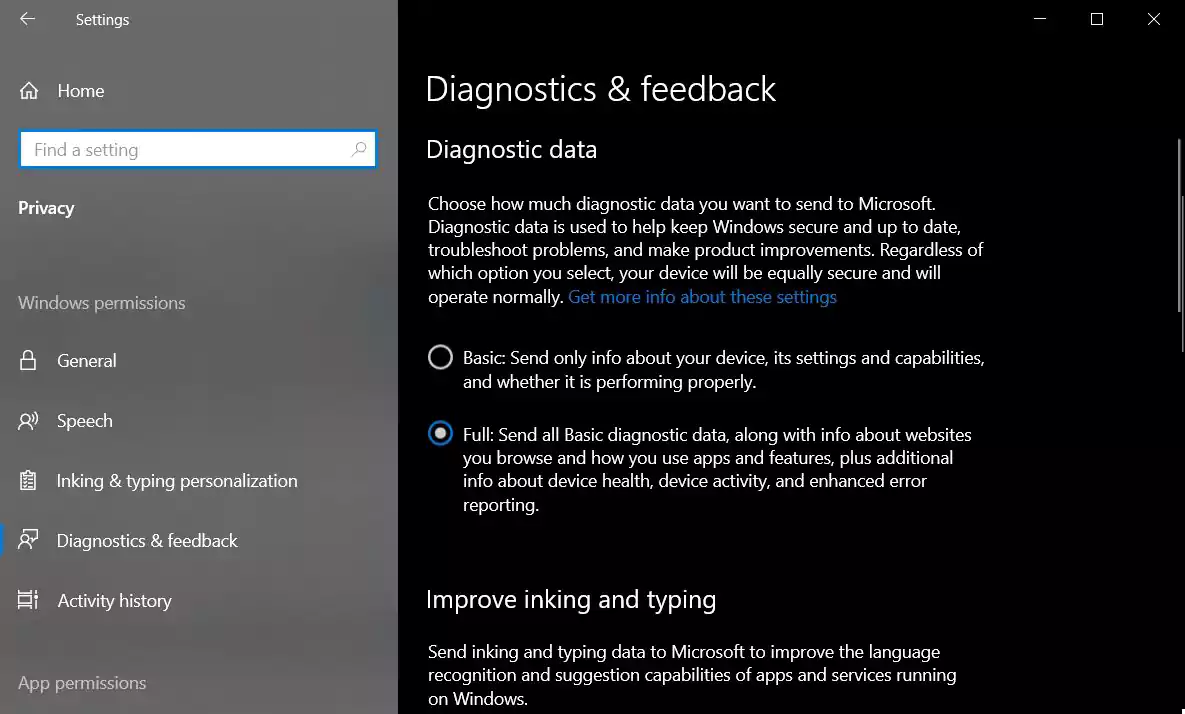
To reduce the data collection, select the first option (Basic). When the Basic option is selected, Microsoft will only record and collect your device’s basic information including settings, features, and performance.
Like diagnostic data, Windows 10 Settings app also allows you to manage permissions for hardware features, such as location, microphone and camera. To disable location access for apps and Windows, you need to launch the Settings app and go to Privacy > Location, and turn off the location access option.
Similarly, you can open Microphone and camera privacy pages, and turn off the access.
When the permission is set to ‘off’, Windows will block all apps from using location, microphone or camera.
Windows 10 comes with a built-in activity history feature called ‘Timeline’. This feature allows you to go back in time to see and resume your work activities, and it also organizes the activities that you do on your PC, Microsoft Edge and Android phone.
Timeline works surprisingly well and it gathers your data actively, which for many is too much of a privacy risk. Fortunately, there’s a way to disable activity history completely.
To disable Timeline, follow these steps:
 Disable Timeline
Finally, you need to click on the Clear option to clear your activity history.
Like Android and iOS, Windows 10 comes with a dedicated settings page for managing the app permissions.
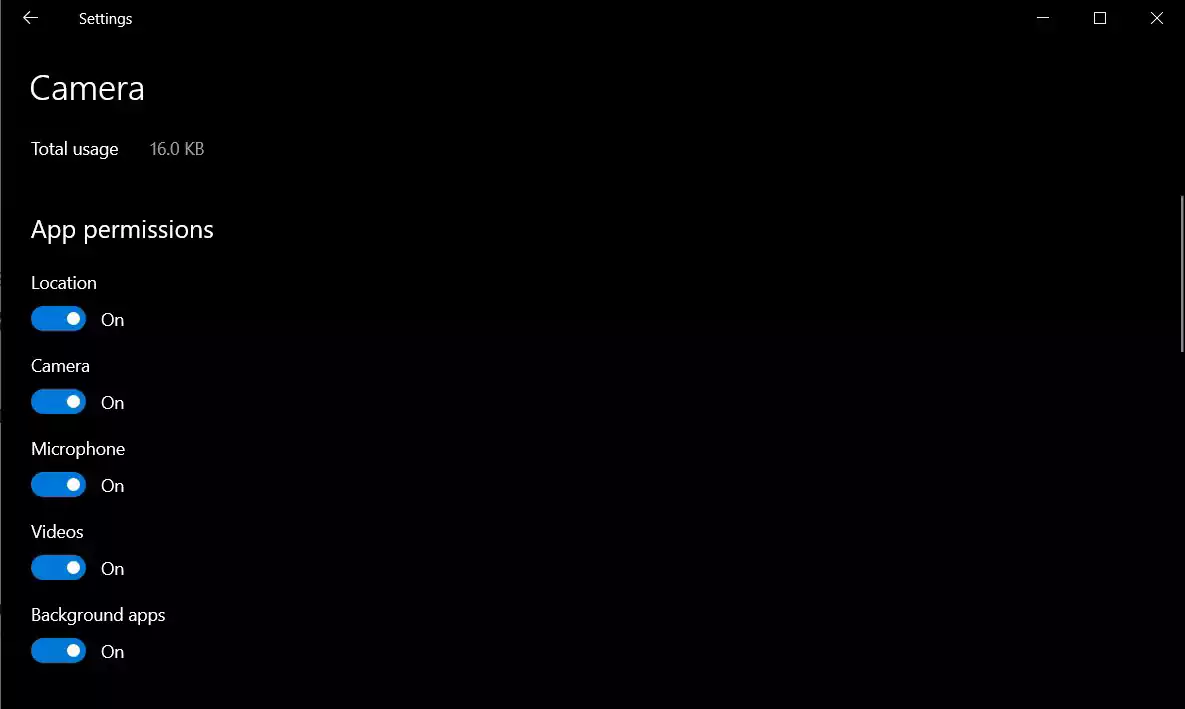
To manage app permissions, you need to open from Settings > Apps > Installed apps and click on the app (eg voice recorder) whose permissions you want to limit.