

Microsoft has created a Windows 10 File Recovery Tool that recovers deleted files and forgot to tell anyone.
Everyone has deleted a file by accident and then realized that they had no backup. If this file was critical, then you may get lucky using a third-party file recovery, or undelete, program to recover the deleted data.
Windows sleuth WalkingCat recently discovered a program created by Microsoft called the ‘Windows Recovery Tool.’
This tool states it is a file recovery program that allows you to undelete files on a hard drive, USB drive, and even an SD card.
“Accidentally deleted an important file? Wiped clean your hard drive? Unsure of what to do with corrupted data? Windows File Recovery can help recover your personal data.”
Microsoft’s Windows File Recovery Tool supports three modes of operation: ‘Default,’ ‘Segment,’ and ‘Signature.’
Each of these modes attempts to recover deleted files from a storage device in a different way, as described below.
When installed, the program will be installed as a command-line tool called winfr.exe.
Below we have provided some examples of how to use the winfr tool in Windows 10.
To use the Windows 10 File Recovery Tool, you need to install the app first from the Microsoft Store.
As this program requires administrative privileges, once installed, you need to launch a Windows 10 elevated command prompt to use it.
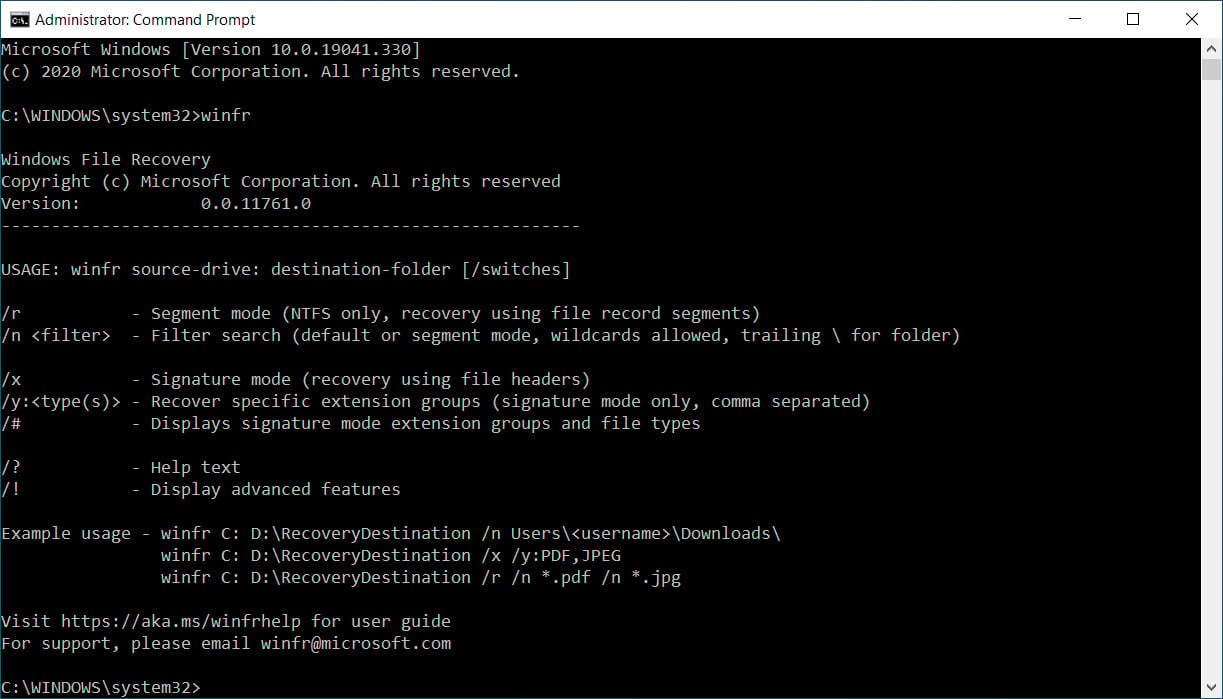
In the command prompt, you can type winfr and press enter to see a list of the available commands.

Windows File Recovery
Copyright (c) Microsoft Corporation. All rights reserved
Version:            0.0.11761.0
----------------------------------------------------------

USAGE: winfr source-drive: destination-folder [/switches]

/r           - Segment mode (NTFS only, recovery using file record segments)
/n [filter]  - Filter search (default or segment mode, wildcards allowed, trailing \ for folder)

/x           - Signature mode (recovery using file headers)
/y:[type(s)] - Recover specific extension groups (signature mode only, comma separated)
/#           - Displays signature mode extension groups and file types

/?           - Help text
/!           - Display advanced features

Example usage - winfr C: D:\RecoveryDestination /n Users\[username]\Downloads\
                winfr C: D:\RecoveryDestination /x /y:PDF,JPEG
                winfr C: D:\RecoveryDestination /r /n *.pdf /n *.jpg

Visit https://aka.ms/winfrhelp for user guide
For support, please email [email protected]
Winfr also includes advanced options, which can be viewed by typing winfr /!.
These advanced options, shown below, allow you to fine-tune the recovery process by specifying what sectors to scan, how the recovery should perform, and disabling specific file extensions.
Windows File Recovery
Copyright (c) Microsoft Corporation. All rights reserved
Version:            0.0.11761.0
----------------------------------------------------------

USAGE: winfr source-drive: destination-folder [/switches]
/p:[folder]    - Specify recovery log destination (default: destination folder)
/a             - Accepts all user prompts

/u             - Recover non-deleted files (default/segment mode only)
/k             - Recover system files (default/segment mode only)
/o:[a|n|b]     - Overwrite (a)lways, (n)ever or keep (b)oth always (default/segment mode only)
/g             - Recover files without primary data stream (default: false, default/segment mode only)
/e             - Disable extension exclusion list (default/segment mode only)
/e:[extension] - Disable specific extension(s) (default extension list no longer applies) (default/segment mode only)

/s:[sectors]   - Number of sectors in volume (segment/signature mode only)
/b:[bytes]     - Number of bytes in cluster (segment/signature mode only)
/f:[sector]    - First sector to scan (segment/signature mode only)
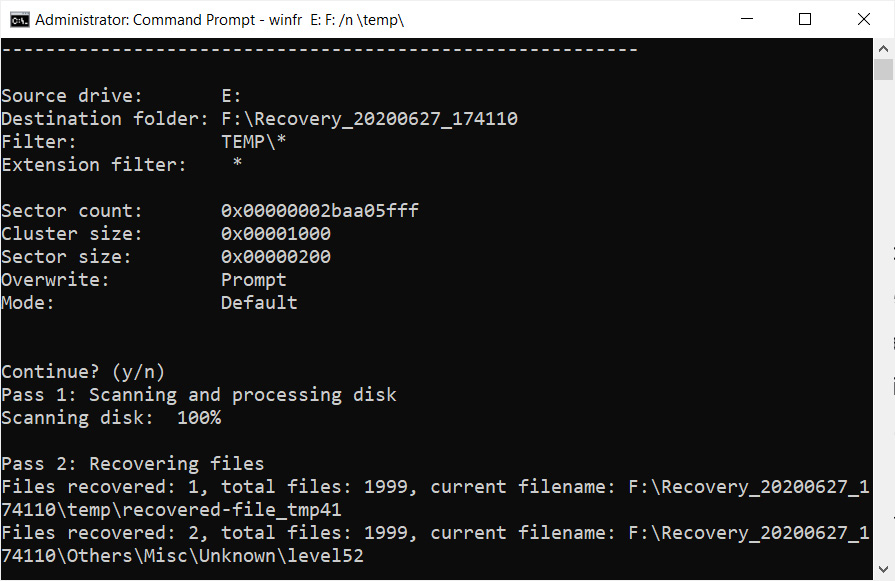
When using the Windows 10 File Recovery Tool, you need to specify the source drive, the drive files will be recovered, and any filters that fine-tune what files are recovered and the file recovery mode.
Also read: 7 Phases Of Data Life Cycle Every Business Must Be Informed
For example, to use the ‘default’ mode to recover all deleted .JPG files on the D: drive and restore them to the E: drive, you would use the following command:
winfr D: F: /n *.JPGTo use the ‘default’ mode to recover all deleted files from the E:\temp folder, you would use the command:
winfr E: F: /n \temp\*.PNG
To use the ‘segment’ mode to search the C: drive for deleted files whose filename contained the string ‘statement’ and recover them to the E: drive, you would use the following command.
winfr C: E: /r /n *statement*Finally, to use the ‘signature’ mode to recover Word documents (.docx) from the C: drive, you would use the following command:
winfr C: D:\RecoveryDestination /x /y:DOCXIt should be noted that when using filters that match a folder name, you should leave off the drive letter.
For example, if you set your source drive to C: and want to recover files from C:\ test, you would use a filter of /n \test\.
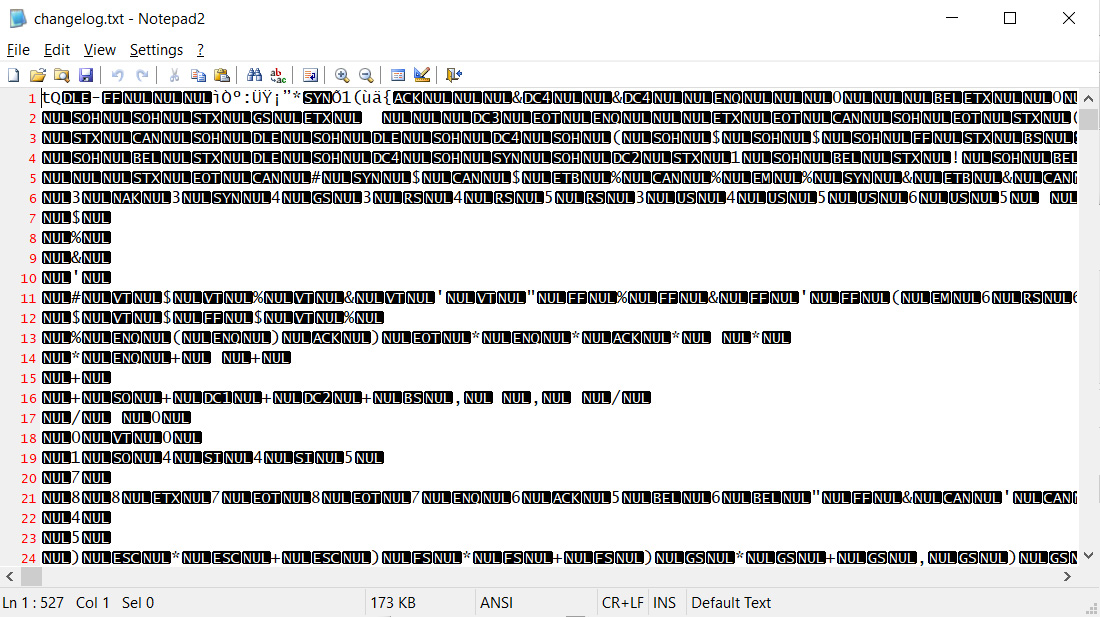
Unfortunately, in our tests, many of the recovered files were not actually usable. When attempting to recover .txt files from our E:, the recovered files were corrupt, as shown below.

We will continue to use the tool in real-life recovery tests to see how well it performs.
For now, though, you may have better success using tools like Photorec or Recuva to recover any deleted files.
Also read: 12 brief explanation about the benefits of data protection for business success